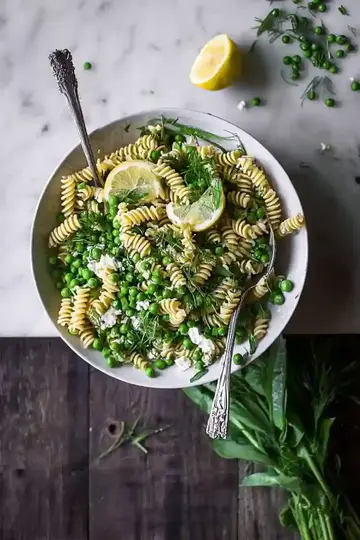
This Spring Pea and Mint Pasta Salad is a bright and fresh dish that’s perfect for the warmer days ahead. Using seasonal ingredients, this salad is light, refreshing, and simply delightful.
This recipe addresses issues of flavor adjustment, preference for warm or cold dishes, and the need for a light spring meal option.

Sometimes, I find it tricky to prepare meals that satisfy everyone’s tastes, especially when I’m dealing with different dietary needs. This recipe not only caters to vegetarians but can also be made vegan. It’s quick to whip up, making it ideal for those days when I don’t have much time.
This recipe works because it balances the earthy flavors of peas with the bright notes of lemon and mint. You can enjoy it warm right after cooking or chill it for a lovely side dish later; it’s ready in just 25 minutes!
Why You Will Love This Recipe
- Fresh Flavor , The combination of fresh peas and mint gives this pasta salad a bright, herbaceous taste that’s super refreshing for spring.
- Textural Appeal , You’ll love the contrast of the creamy truffle oil and the crunchy peas, making each bite interesting and satisfying.
- Quick and Easy , Ready in just 25 minutes, this dish is a breeze to whip up, perfect for those busy weeknights or last-minute gatherings.
- Storage-Friendly , It keeps well in the fridge for 3-4 days, so you can enjoy leftovers without losing that fresh taste.
Ingredient Notes

- Pasta: Any pasta shape you like works well here. Just cook it al dente for the best texture. I usually go for something fun, like farfalle!
- Fresh peas: Fresh or frozen peas are a must for that sweet touch. I wouldn’t recommend canned peas here; they just won’t cut it!
- Truffle oil: A drizzle of this oil adds a fancy touch. I prefer white truffle oil for its subtle flavor, but feel free to use olive oil instead.
- Fresh mint: Chopped mint brightens everything up! Get the freshest leaves you can find; they really bring a burst of flavor to the salad.
- Lemon juice: Fresh lemon juice is key for that tangy kick! If you’re in a pinch, bottled lemon juice will do, but fresh is always better.
Keep scrolling to the recipe card below for the full printable recipe!
Recipe Tips
- If pasta is overcooked and mushy, remove from heat immediately and follow the package directions closely for perfect texture.
- When the dish lacks flavor, consider adding more sea salt and a splash of fresh lemon juice for a bright taste.
- For vibrant peas, drain and rinse them right after blanching to keep their color fresh and appealing.
- If you prefer a chilled pasta salad, rinse both pasta and peas in cold water for a refreshing finish.
- For extra crunch, add toasted nuts like pine nuts, which can enhance texture without compromising flavors.
Serving Suggestions
- Serve spring pea pasta salad with grilled chicken for added protein. It works well alongside burgers at a summer barbecue, or as a light side dish for fish.
- This pasta salad can also complement other dishes like roasted vegetables, a quinoa salad, or a bean salad. It fits seamlessly into picnics, potlucks, and family meals.
- Consider pairing it with a drizzle of lemon vinaigrette or a simple olive oil and vinegar dressing. A sprinkle of fresh herbs can add brightness just before serving.
Storage Guidelines
- To keep your spring pea pasta salad fresh, follow these storage tips:
- Refrigeration: Store in an airtight container in the refrigerator for up to 4 days. This method preserves flavor and texture.
- Freezing: Place in a freezer bag and remove excess air. Freeze for up to 3 months. Thaw overnight in the refrigerator.
Recipe Variations
- You can use quinoa instead of pasta for a gluten-free alternative that still holds up in this salad.
- Add 1 teaspoon garlic powder or 1 minced garlic clove for an extra punch of flavor.
- Either use fresh basil or parsley in place of mint for a different herbaceous note.
- If you want to scale this up, use 18 ounces of pasta and 4 , 5 cups of peas to serve more people.
Did you make this recipe? Scroll down to leave a star rating and review!
Spring Pea and Mint Pasta Salad
Equipment
- Large pot
- Colander
- Large Bowl
- Measuring cups
- Measuring spoons
- Knife
- Cutting board
Ingredients
- 12 ounces pasta any shape
- 3 – 4 cups fresh peas or frozen (450 – 600 grams)
- 5 scallions thinly sliced
- 1 shallot very finely diced
- 1 cup fresh mint chopped
- 1 cup Italian parsley chopped
- ½ cup olive oil high quality
- 2 lemons zest and 1/4 cup (60 milliliters) juice
- 2 cups fresh pea shoots, or baby spinach or arugula
- 1 teaspoon salt , plus more to taste
- ½ teaspoon white pepper or black
- 1 tablespoon truffle oil preferably white
- goat cheese Optional – crumbles
Instructions
- Start by boiling water and cooking your pasta until it is just al dente, according to package instructions. It should be tender but still have a little bite to it. Keep an eye on the clock to avoid mushy pasta.
- Once the pasta is ready, toss in your peas for a quick blanching session. They should turn a bright green and smell fresh and sweet. Drain them immediately to prevent overcooking, and then run them under cold water to stop the cooking process.
- In a pan, heat some olive oil and toss in the shallots and scallions. Gently sauté until they are fragrant and just starting to soften. Avoid burning them for the best flavor, which adds depth to your salad.
- In a large bowl, combine your cooked pasta, blanched peas, mint, parsley, and pea shoots. The mixture should feel light and vibrant as you mix. Enjoy the lovely herbal aroma wafting up!
- Now, drizzle in your high-quality olive oil, lemon zest, and juice, along with the salt and pepper. It should look glossy and inviting. Remember to taste as you go to avoid it being too salty or tangy.
- Finish with a splash of truffle oil for that luxurious touch. The aroma will be great! Just a little bit goes a long way, so do not pour too much in all at once.
- If you are feeling it, sprinkle on some goat cheese crumbles just before serving. They will add a creamy component that ties everything together!
- You can either let the salad chill in the fridge for a bit or serve it straight away. If chilling, the flavors meld beautifully. When serving right away, ensure it looks fresh and colorful; it should feel refreshing to eat!
Leave a Reply